
Purpose
This page outlines the steps for setting up a new client Facebook ads account to ensure consistency and adherence to correct procedures.
Application
The following steps are tasks that the ads manager is responsible for when creating the new account.
1. Preparation Before the New Account
Have you done the following:
- Has admin page access to the client's Facebook page been requested?
- Has the client been notified the page access has been requested?
- Once access is obtained, have you added all users to all assets?
If not, complete these steps before proceeding.
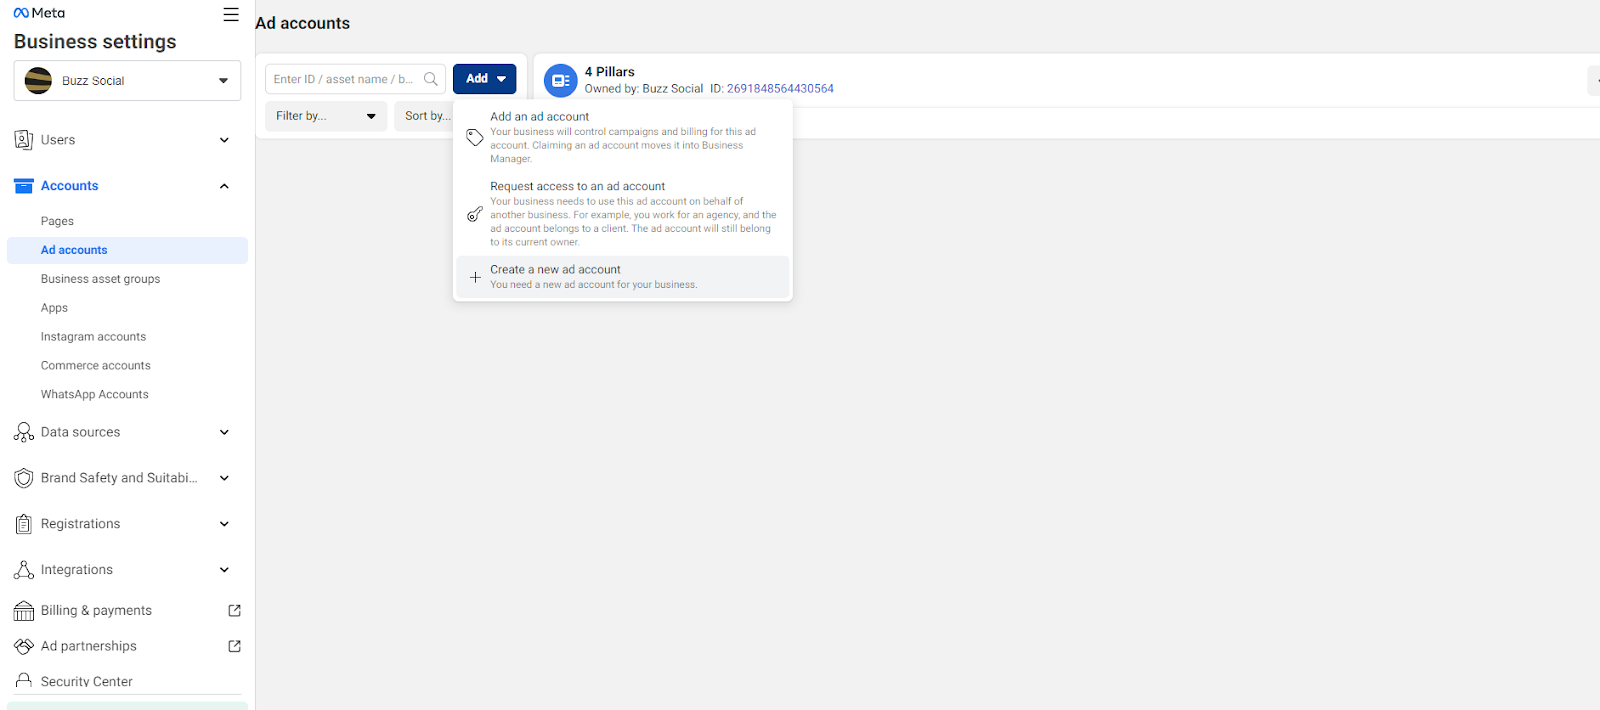
You can start by going to the business settings under Buzz Social, going to the Ad Account, and clicking the plus button.
2. Name the Account & Create a Task
Name the account according to the client's company name. Then, create a task via the task list to inform Barry or Niko that you need a float card. Make sure to also post the total monthly spending in the task stream.
3. Check Pixel Installation or Create the Pixel
Check if the pixel has been added. If not, you must create a ticket to get it added to the client's website. This is what you will need to send:
First, create the pixel by clicking under data sources and then data sets in the business settings.
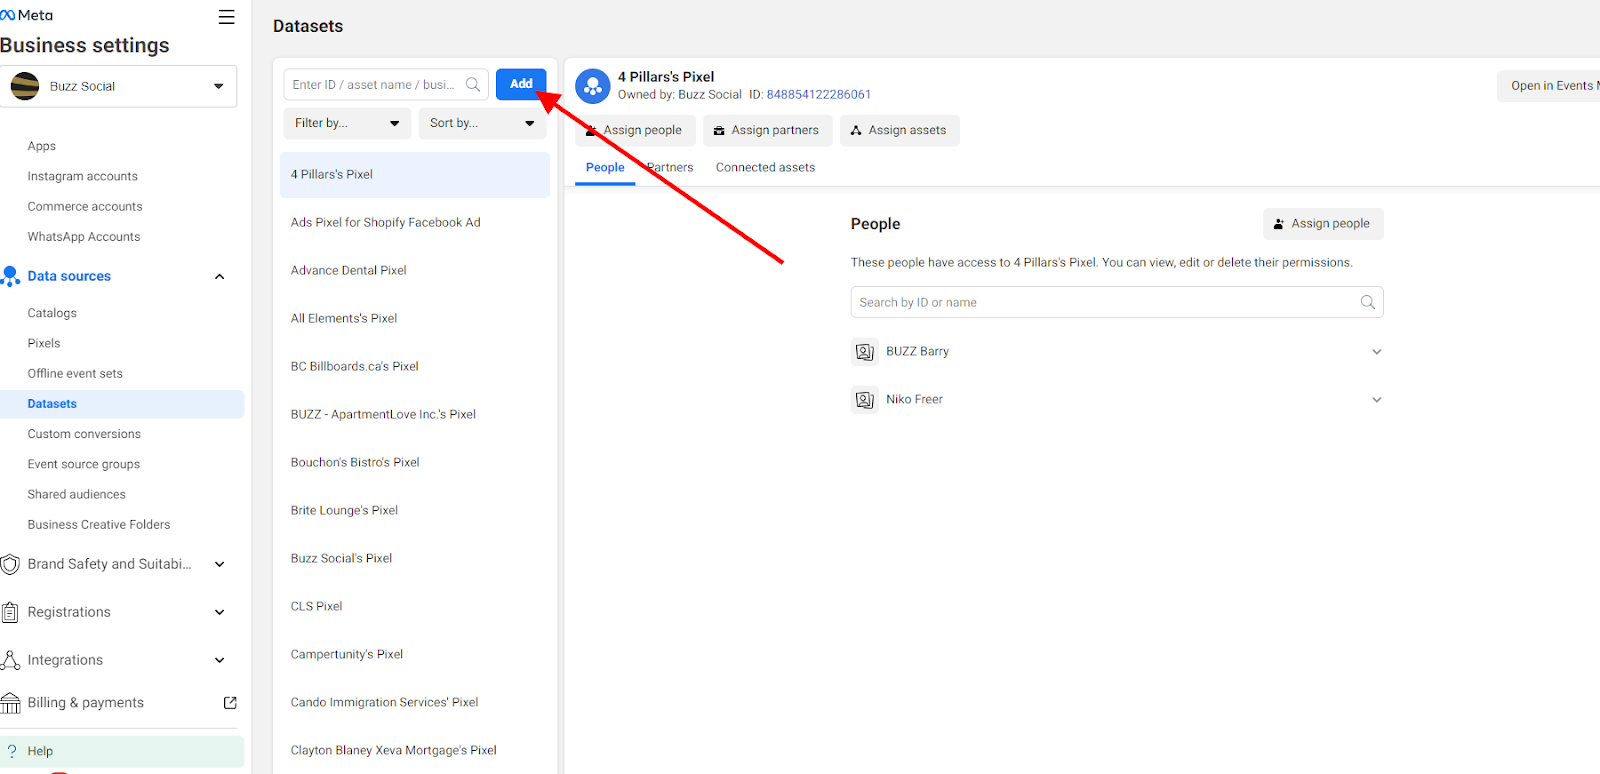
Then, name it according to the client's business name. Next, click Open in Events Manager.

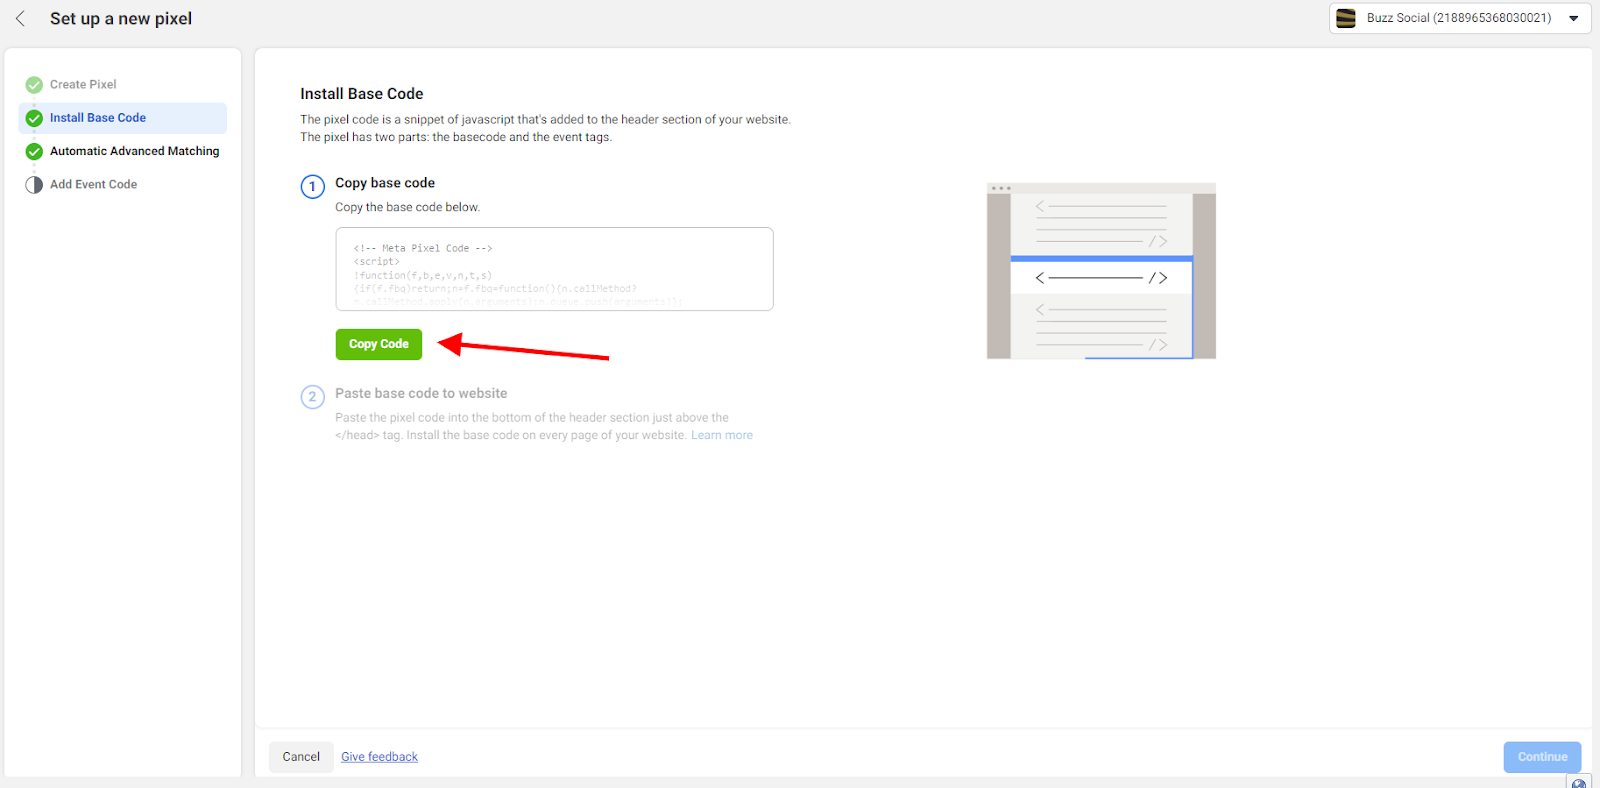
Scroll down to set up meta pixel and then click Install Code Manually.
Once that is complete, click Copy Code.
You will need to send this code in a ticket. If you have not already, create a new ticket with the subject being that you need a pixel installed on the client's site that you are building the Facebook account for.
Make sure to leave the ticket unassigned, as it will be distributed based on who has the lesser workload and more time. Feel free to move on to the next account-building steps, as this step may take 24-48 hours to complete.
4. Verify the Pixel Works
Once the ticket you submitted on the pixel implementation is completed, you can verify if it works. This will be evident if activity starts to be recorded by pixel.
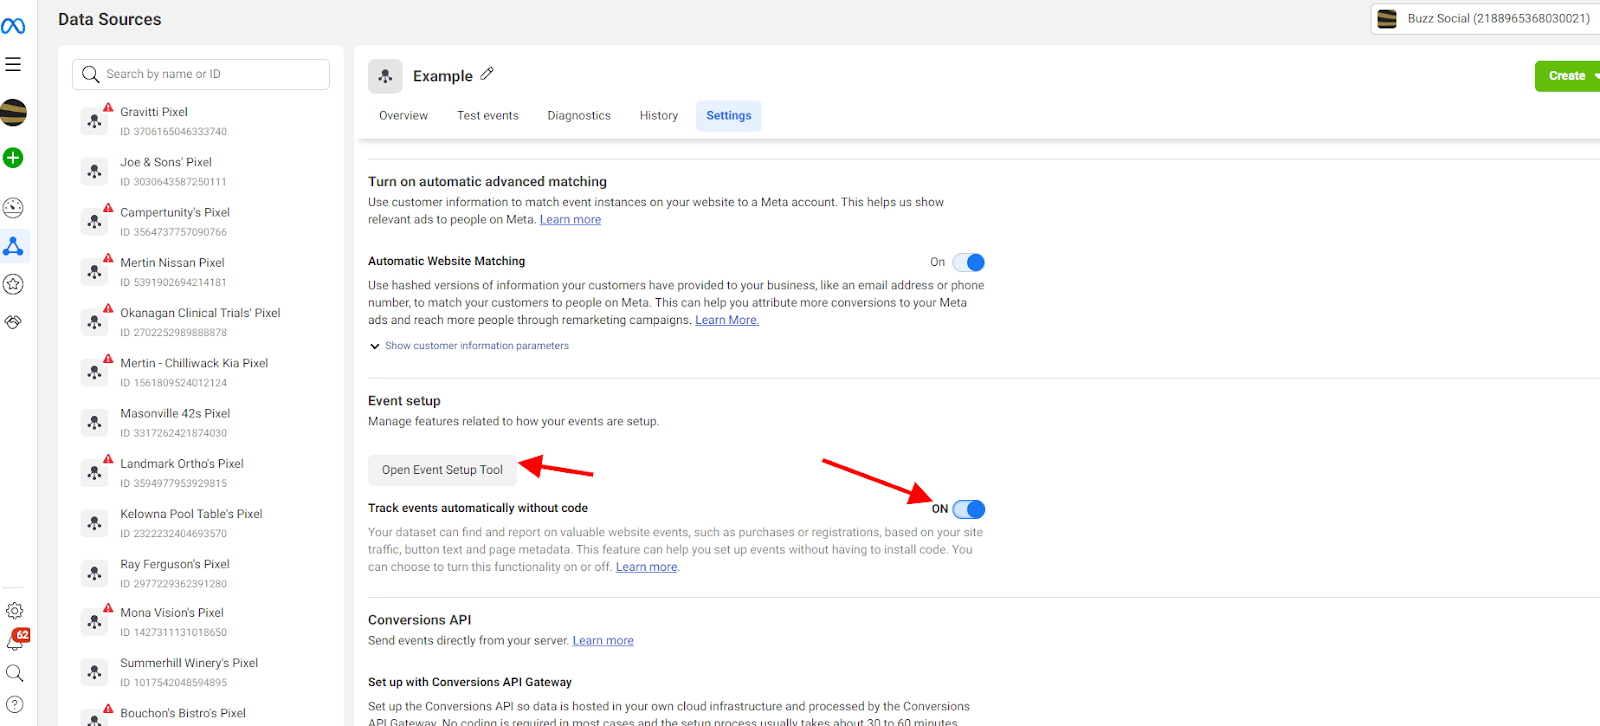
You will then need to set up pixel events using the Event Setup tool. Go to settings, scroll down to Events Setup, and click Open Event Setup Tool. While you are here, toggle the Track events automatically without code to on.
5. Set Up Events
You will need to set up the events themselves.
After clicking Open Event Setup Tool, you will need to enter the client's website into the URL bar and then click Connect. You will automatically be directed to the site. Then, click the Track New button. You will then be able to select the button you would like to be able to track.
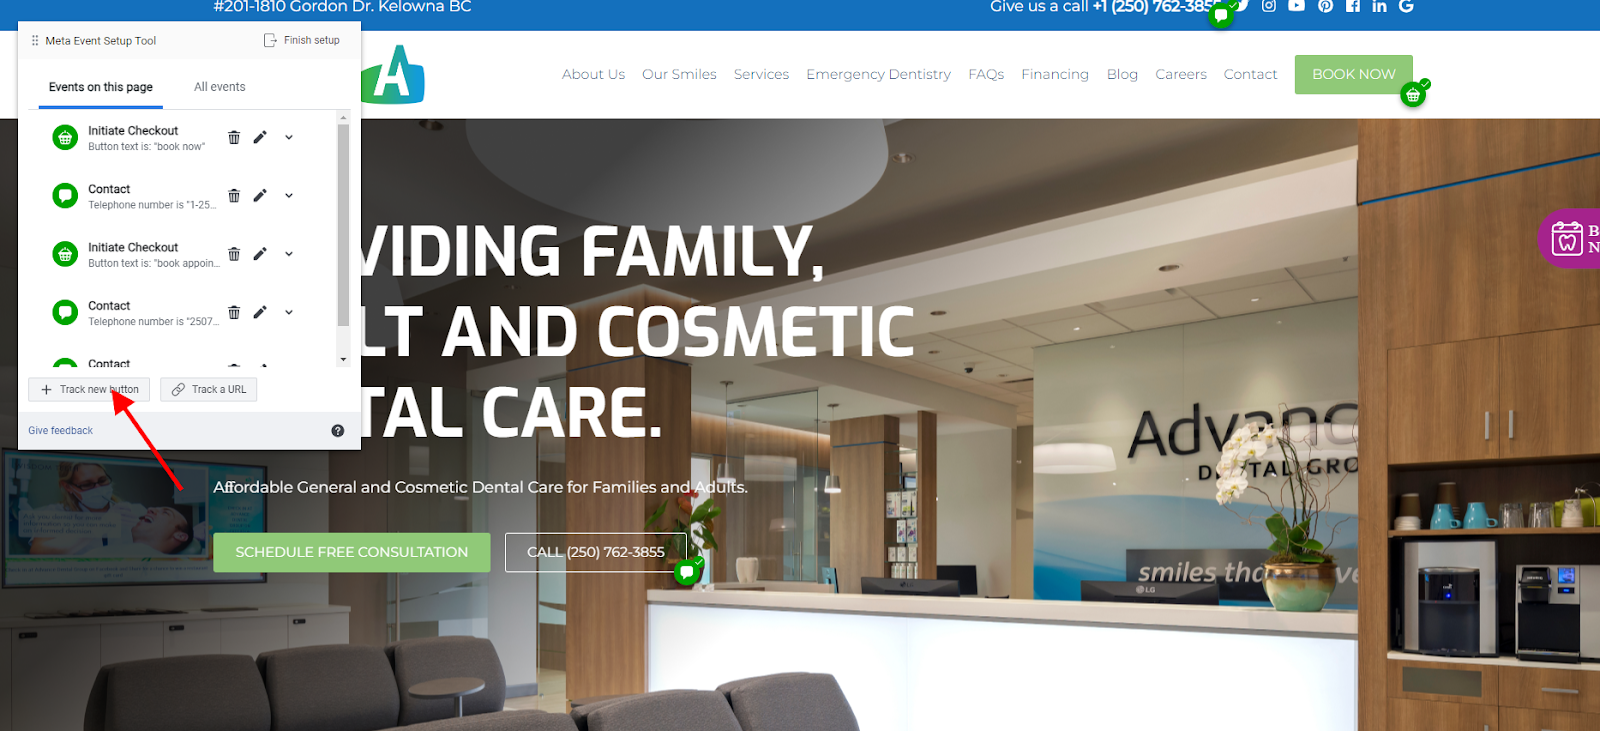
Then, choose the event type for the button you just selected. For example, if it is a contact button, you would most likely choose the Lead category. Once you have done this, click Finish Setup.
Now, you have successfully finished the entire pixel setup!
6. Create the First Campaign
Proceed to set up the first campaign using the predetermined strategy discussed previously. Refer to the client's advertising form details, such as targeting, hooks, and other vital details.
7. Queue a Task
After creating a campaign structure, make sure to queue up a task to get the creatives made.
8. Edit Ad & Send to Client
Once you have obtained the ad creatives, write the ad text, description, and headlines.
Once the ad is finished, send screenshots to the client through Teamwork. Make sure to do that through the client support thread.
9. Double-Check
Double-check the campaigns that have been created. Are they named correctly at each level? Is the location targeting accurate? Are their qualifying audiences? Are the detailed interests selected accurately?
10. Audience Selection
Once you have double-checked the campaigns, go into the Audiences Section and ensure all relevant audiences have been created.
This could include, but is not limited to:
- Facebook and Instagram page engagement audience and corresponding LLA's.
- Website visitor audience and corresponding LLA's.
- Customer audience based on the event you set up and corresponding LLA's.
- Any other relevant audience for that specific amount.
11. Put the Ads Live
Once you have received the client's approval, you can put the ads live. Make sure you set the budgets based on a 30-day cycle. Post a note to Teamwork regarding all that you have done, as well as time logs. Then, on that same note, add the Office Admin to start a recurring bill.
12. Set Up Reporting
As a last step, ensure you set up reporting for the account [add setup reporting sop].