Purpose
This page will outline the steps to take to properly set up a Local Service Ads account, ensuring a seamless and efficient setup process.
Application
The procedure of setting up the LSA account is performed by the account manager assigned to the account.
1. Add the Account
Start by signing into the Google Local Service Ads. Make sure to sign in as MCC Buzz.
Login Credentials
Username: mccbuzz@gmail.com
Password: x23xBUZZP@$$
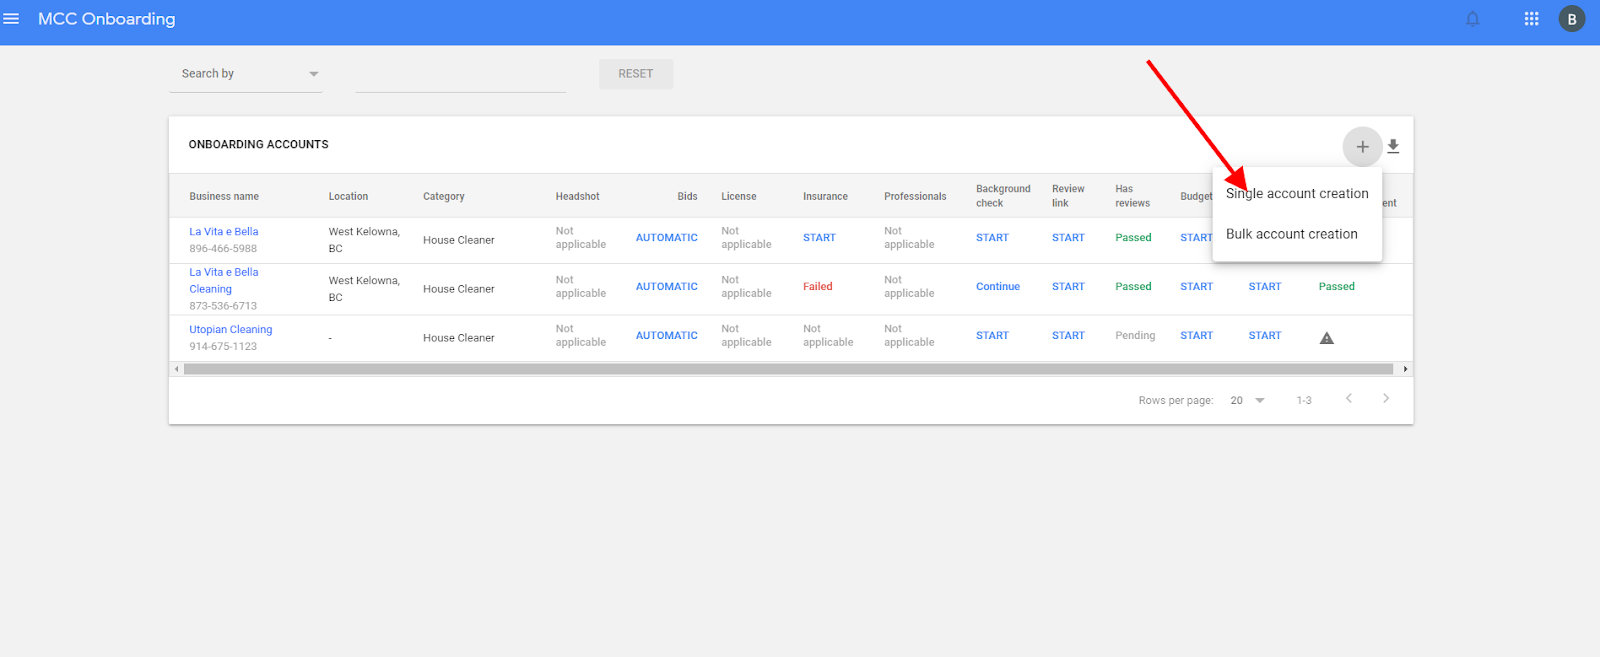
Under the Buzz manager, click on the plus symbol and then Single account creation.
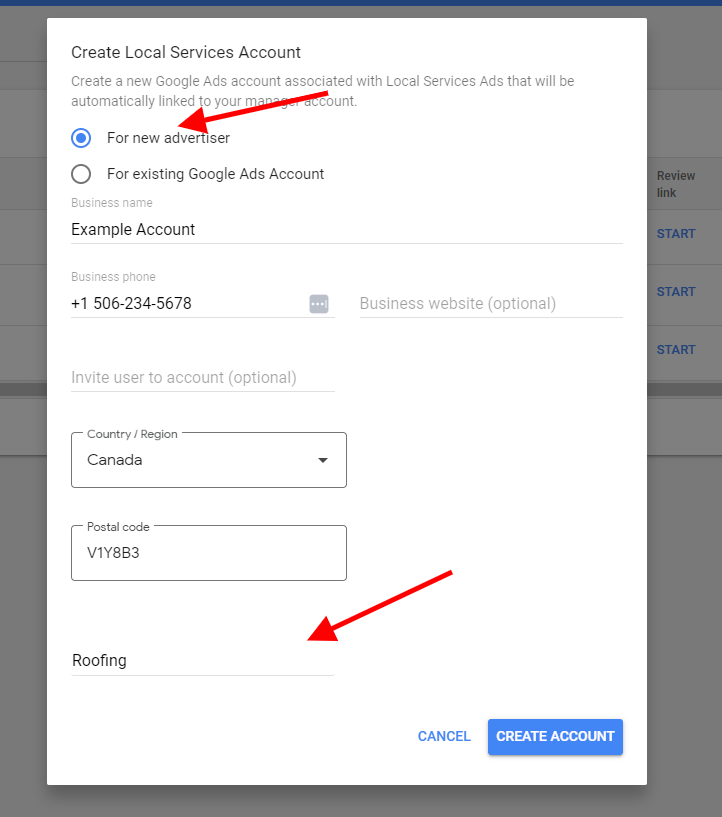
2. Enter all Business Information
Enter all of the business information. Make sure you select For new advertiser when creating the account. Select the business category before clicking on Create Account.
Enter the remaining business details on the next page. Refer to the client's form to ensure all the information is correct.
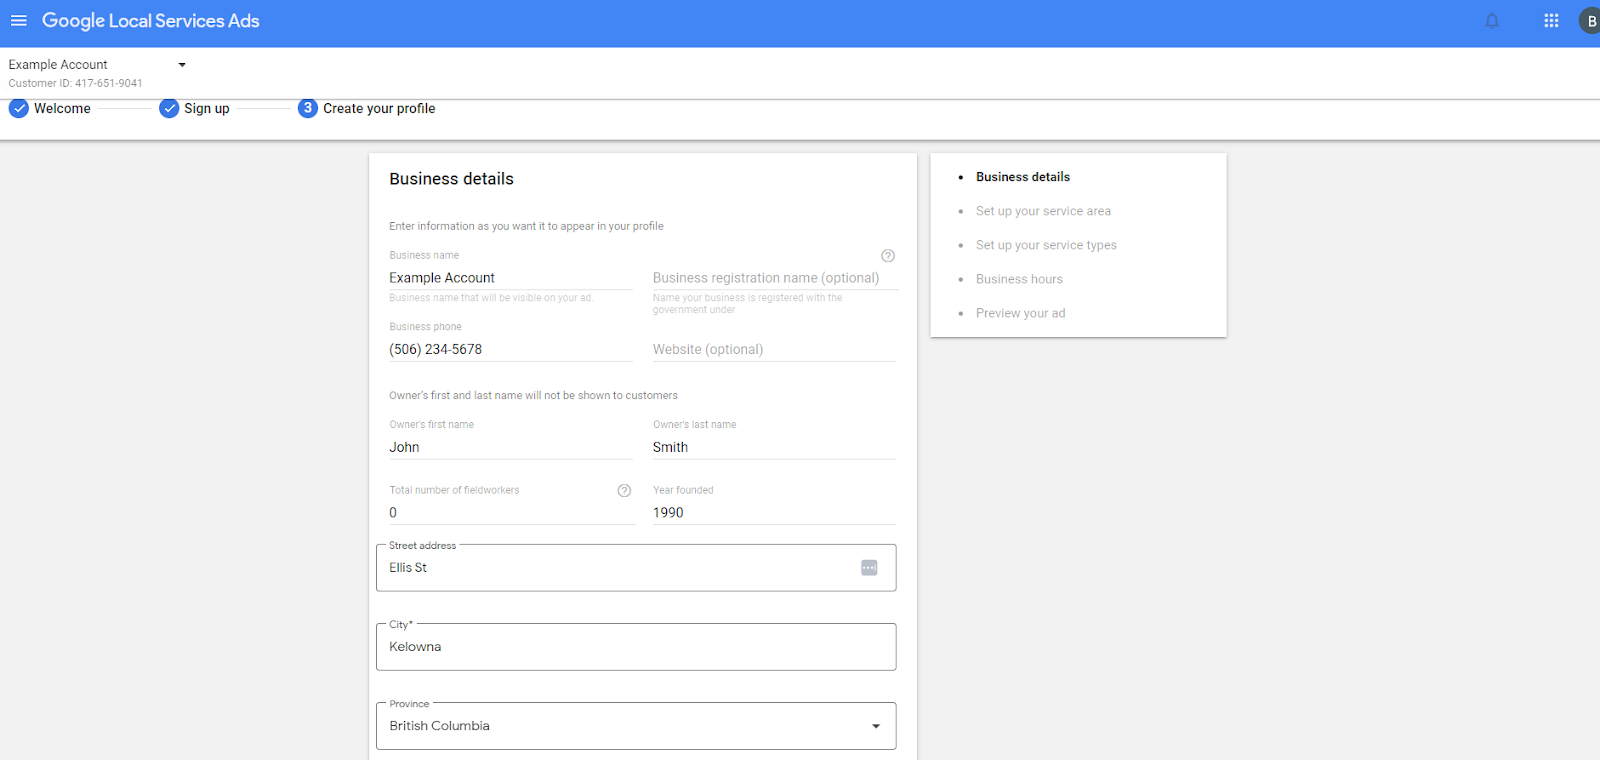
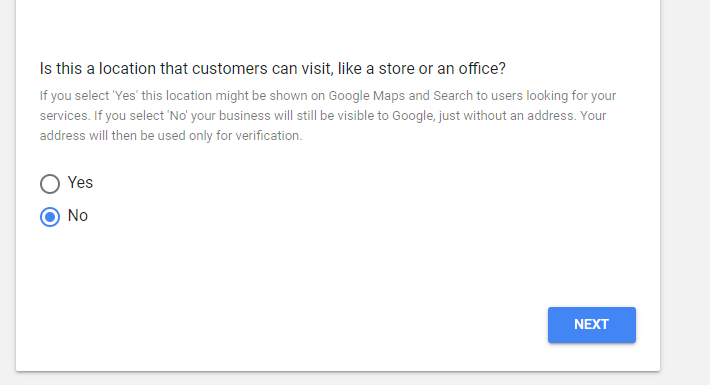
If the business has a storefront, make sure you select Yes.
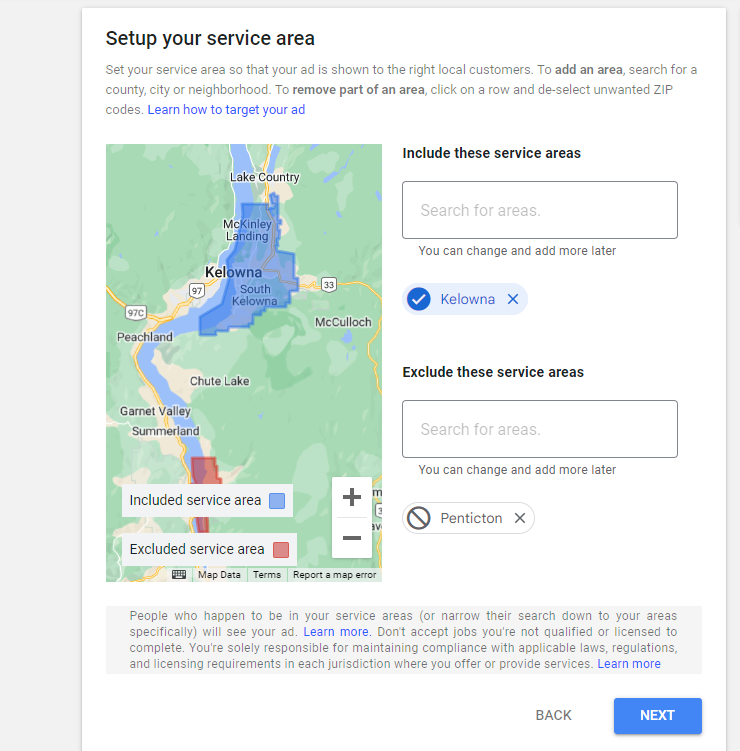
Next, select all the service areas that the business serves. You can exclude areas if needed.
3. Select Services & Business Hours
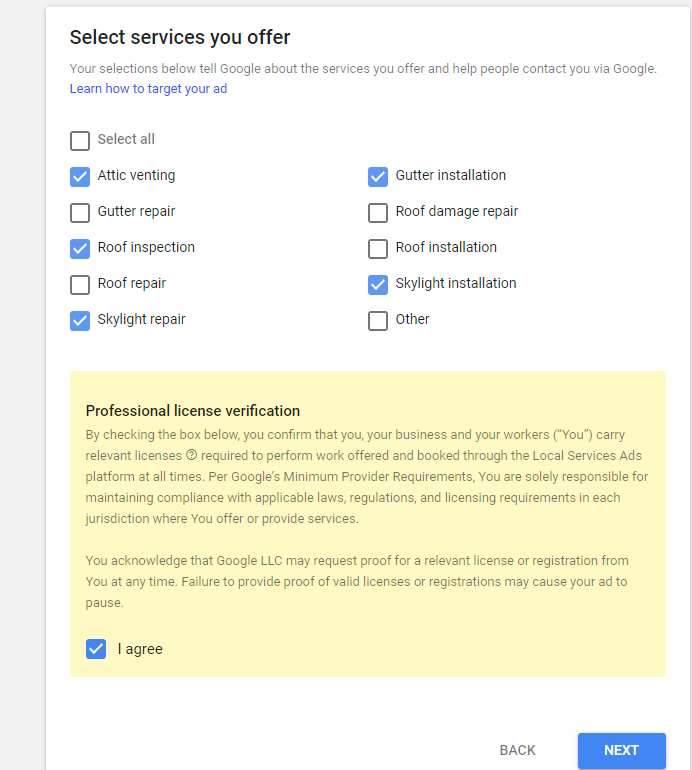
Then, select the services the business offers. Select all the ones you know, as these can always be changed or updated later.
Then select the business hours. If this is a 24/7 business, then put that as it is.
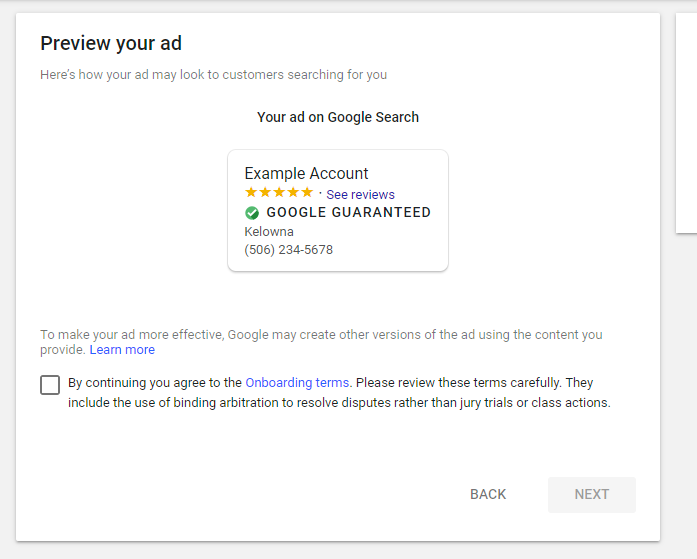
4. Check the Preview
You will be shown a preview of the ad. Double-check that all the information is accurate and correct.
5. Verification & Background Check
At this point, you will be taken to a verification screen. If you have not already done so, inform the client that you require a current copy of their proof of insurance. Upload the file and click Submit.
You will then need to send a background check to the client for them to complete. Additionally, you will need the client's move-in date when completing this step. The other address information will be pre-filled.
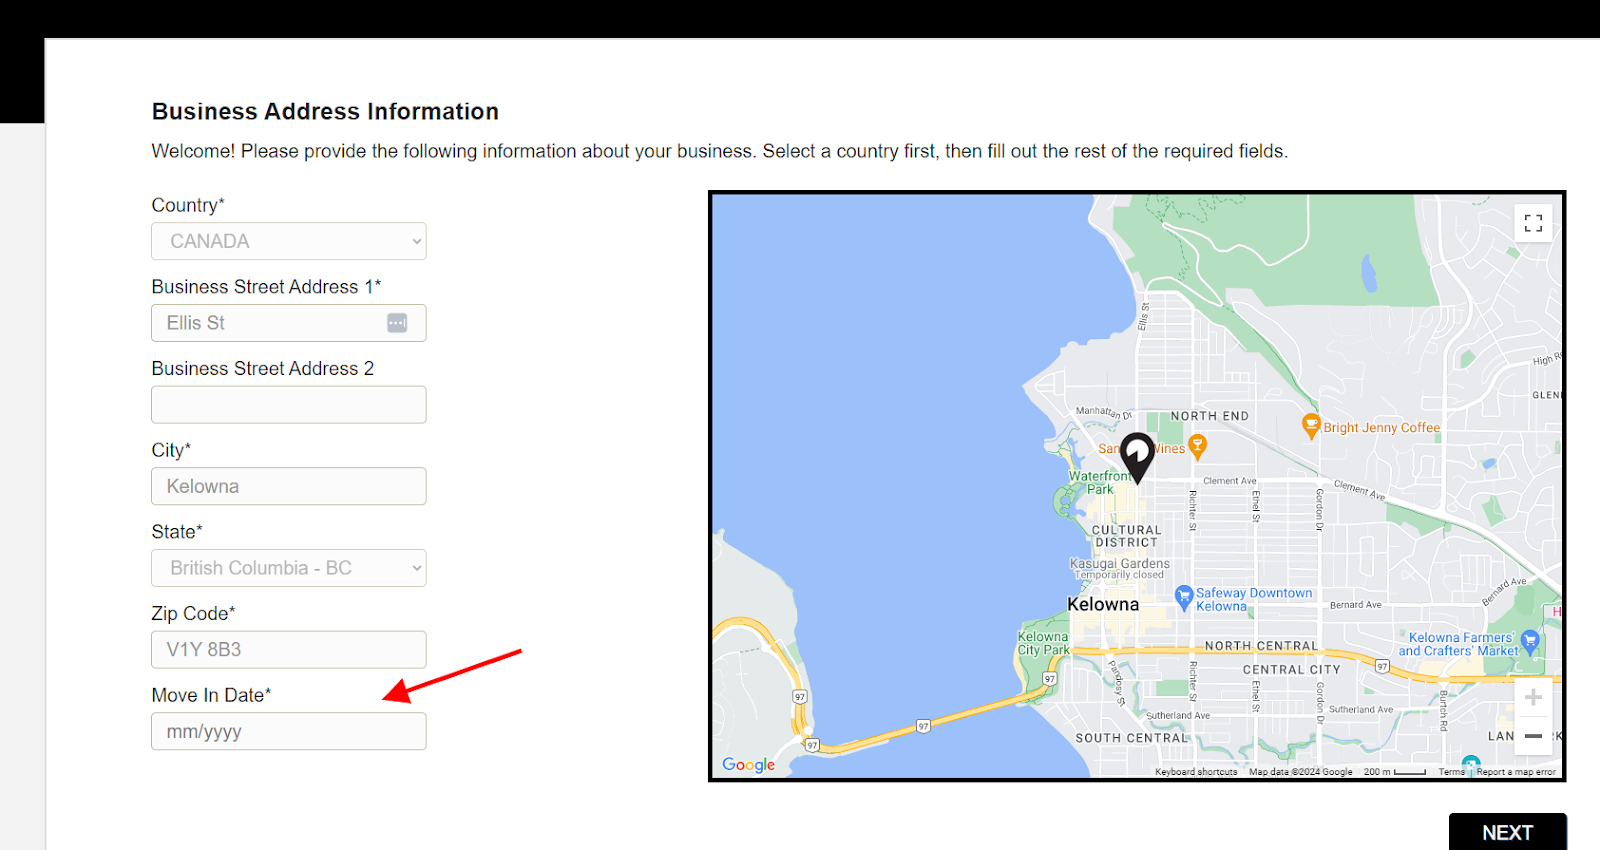
Then, you will proceed to provide the rest of the information needed so that you can send the check to the client. Make sure that you select Authorized Representative when prompted.
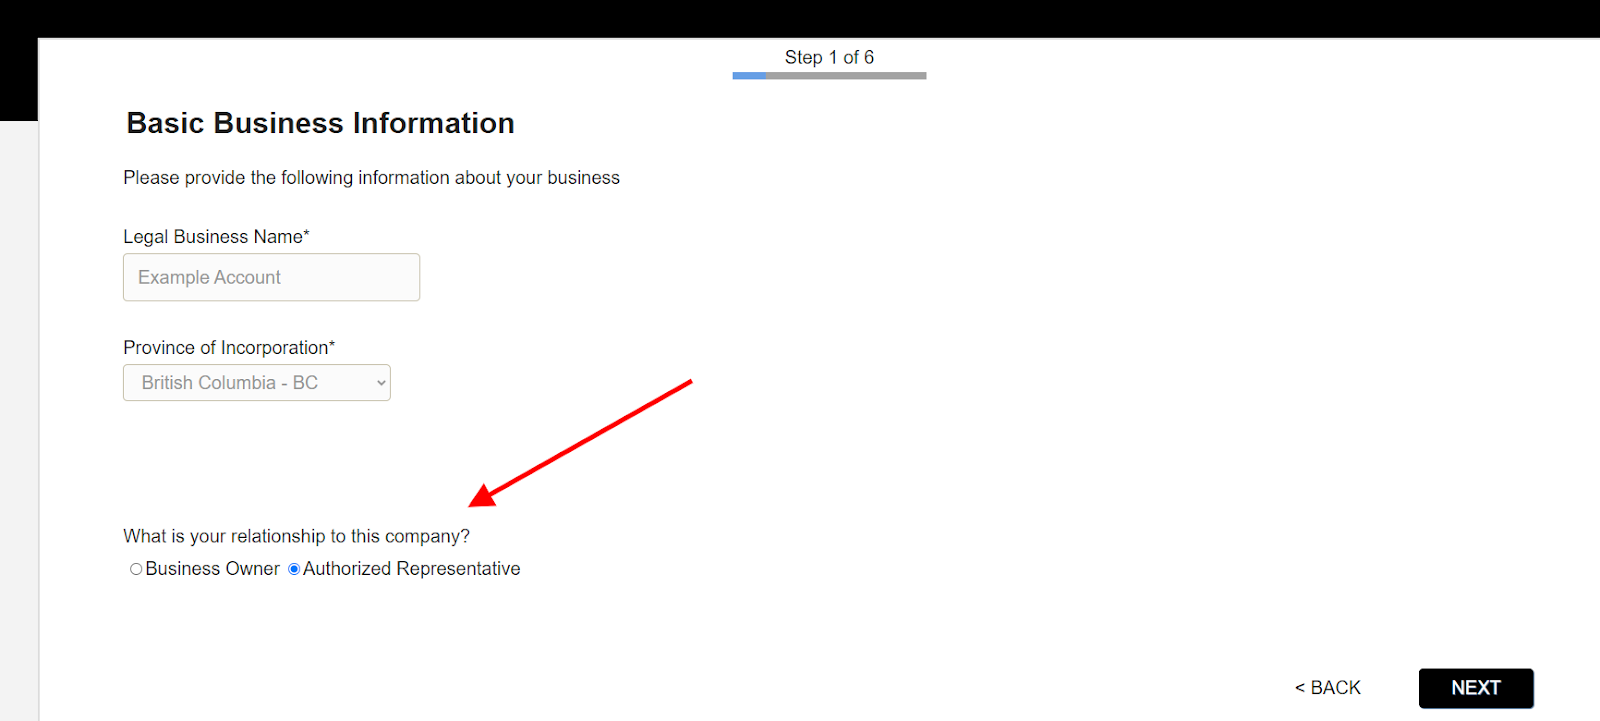
Fill out the business owner's information as well as your own as directed.
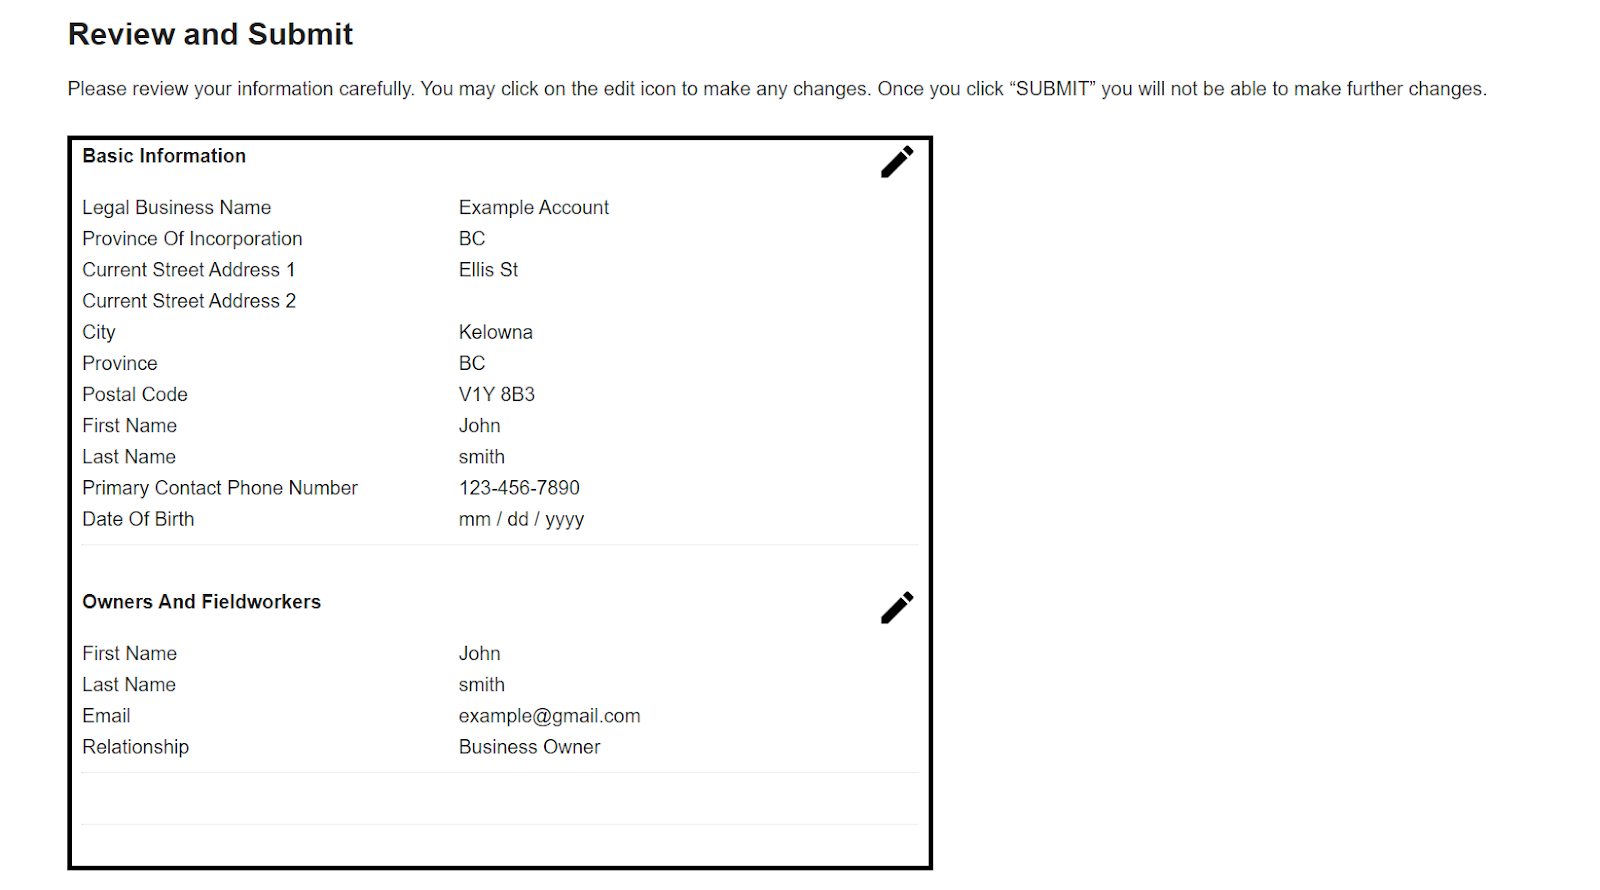
6. Review Information & Send to Client
You will then be able to review the information, submit it and send it to the client.
After this is completed, go back to the verification screen.
The customer review section should automatically populate, so no action is required; however, keep an eye out to ensure they get imported.
Then, the budget should be set according to the client's target spend. The budget is set weekly, so take the client's monthly spend and divide it by 4.
7. Queue a Task
Next, you will need to queue up a task to get a load card created for this account. In the task notes, include the total monthly spend and assign it to Niko or Barry.
8. Put the Ads Live
Once everything is verified, you will be ready to put the ads live. If applicable, add some photos to the account to help with the ad's visibility.
Inform the client once the ad goes live. Post a note on Teamwork that this has been done. Make sure you inform the Office Admin as well.
You will need to set a recurring reminder in Teamwork and via your Buzz Google calendar to tally up the spend on the first day of each month. Then, you will post the spend totals in the ad spend stream notebook on the first day of each month.
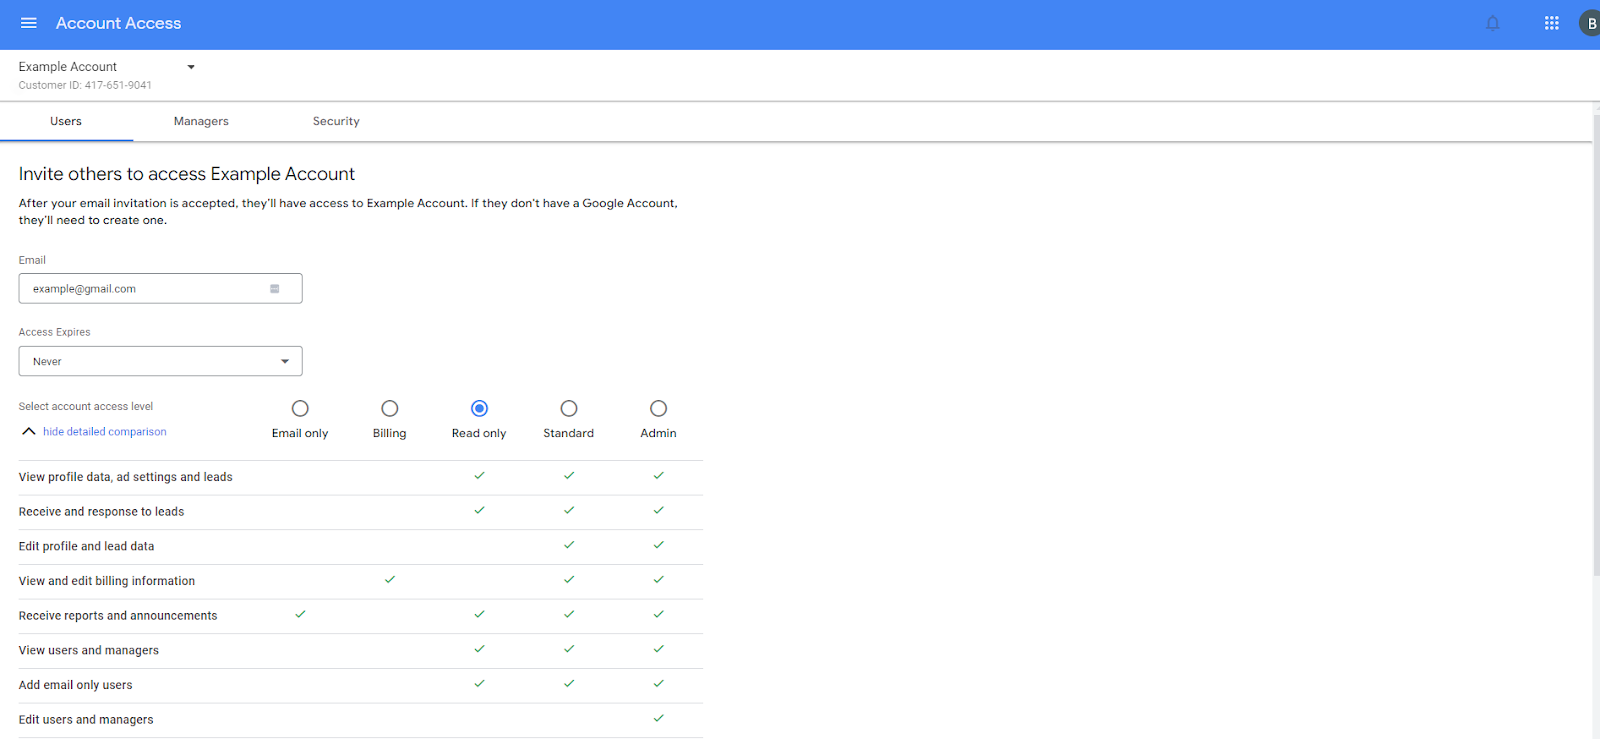
9. Add the Client as a User
Make sure to add the client as a user to the account at the reader level only. This will allow them to know when they have received a lead.
This is option can be found under Account Access.