
Purpose
This page explains the process of onboarding new employees and getting them set up in QuickBooks for payroll.
Application
This procedure applies to the Office Administrator/Bookkeeper or any individual filling that role. Information must be added to QuickBooks when a new employee is hired, whether part-time or full-time.
1. Gather the New Employee's Personal and Banking Information
Ask the new employee to complete the TD1BC and TD1 Personal Tax Credit Return Forms( Provincial and Federal). These forms determine the amount of provincial and federal tax deductions.
These forms will gather personal information such as date of birth, address, and social insurance number. The employee will also be asked to provide a void cheque for payroll.
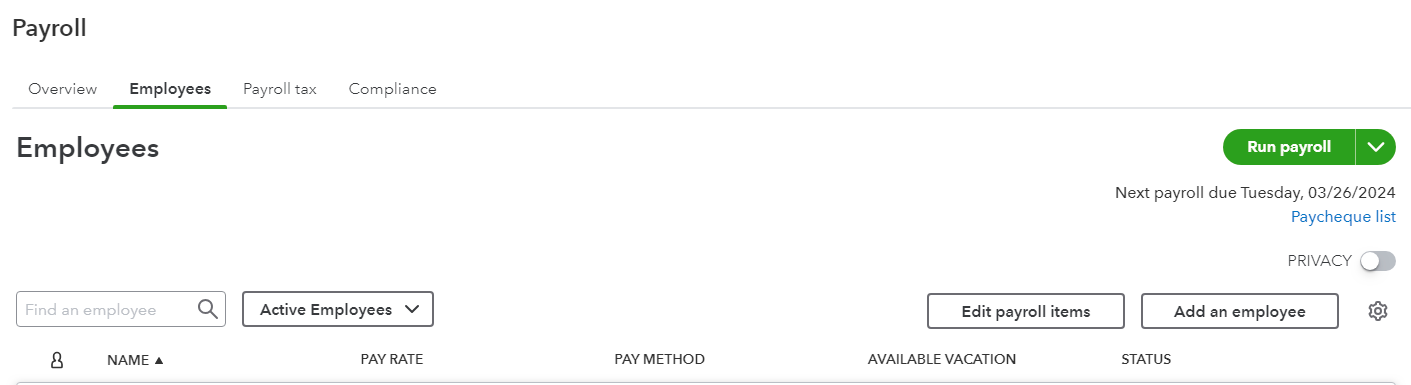
2. Add the Employee in QuickBooks
Log in to the Buzz Quickbooks Online.
Once logged in, go to the Menu on the left side of the dashboard. From the menu, click the arrow at Payroll. This will bring you to the Employee's dashboard.

On the Employee dashboard, click the Add an employee option at the top right.
Next, the add employee screen will pop up.
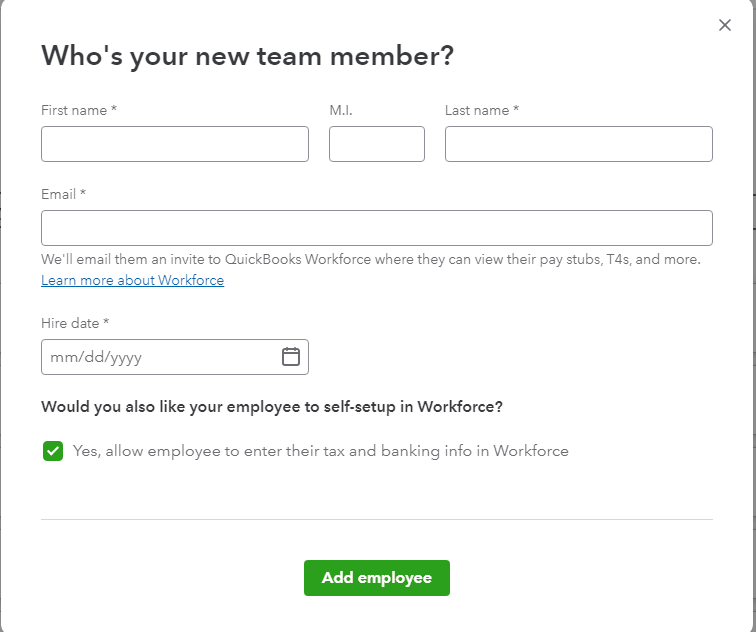
Fill in the required information.
Untick the box for the question: Would you also like your employees to self-set up in Workforce?
*You could allow it, but it would be quicker and easier if the Office Admin completed this process instead of the employee.
Then, click the Add Employee. This will bring you to the employee profile.
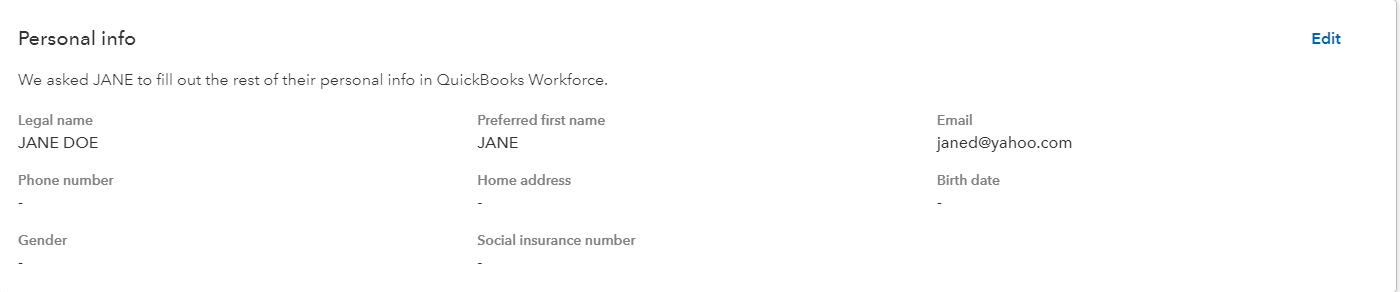
3. Complete the Personal Info & Employment Details
Next, click Edit to complete the Personal Info section.
Next, complete the Employment details section.
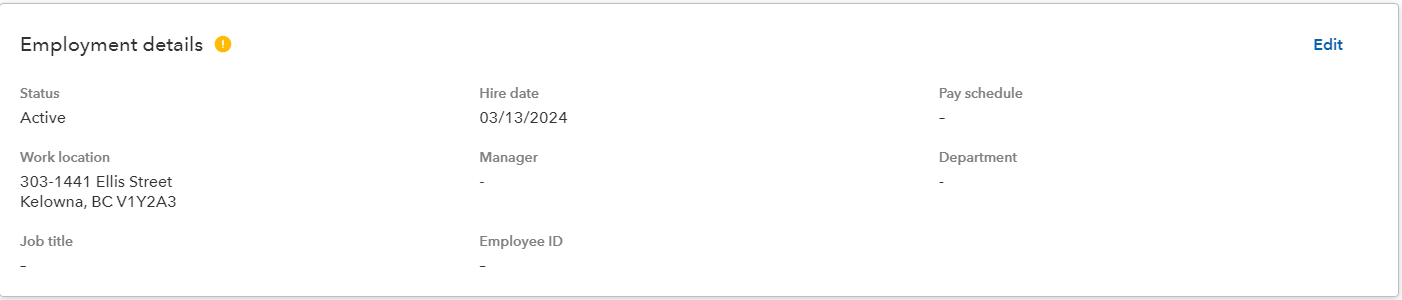
A few fields in this section will auto-complete (status, hire date, work location). Fill in the remaining incomplete sections:
Pay schedule: semi-monthly
Manager: (optional)
Department: (optional)
Job title:
Employee ID: N/A
4. Complete the Tax Withholding Section
Next, complete the Tax withholding section. Usually, the basic amounts found on the TD1 forms will already be populated. However, double-check the form completed by the employee to make sure the amounts match, as additional amounts, such as Tuition, will affect the total.

If changes are to be made, click Edit. Change the amount for the Federal and Provincial withholding. If the employee wishes to deduct an additional amount for income tax, this can be entered as well.
5. Complete the Payment Method Section

Click Start to proceed. At the drop-down arrow for Payment method, choose Direct deposit. Enter the employee banking information from the void cheque or pre-authorize payment form. Then, Save.
6. Complete the Vacation Policy Section
This section is usually auto-populated as 4% paid out each pay period.

Since employees are being paid when vacation time is taken, this option will have to be changed if this also applies to the new employee. To change this, click the Edit button.
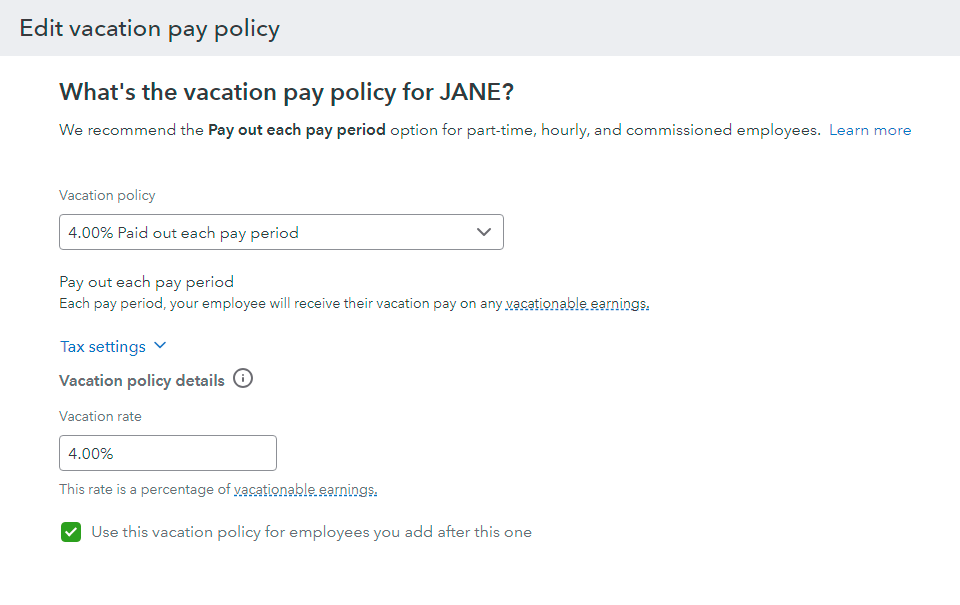
At the Vacation policy drop-down arrow, choose the option that applies:
- 80 hours/year(accrued each pay period): Use this if vacation pay starts after working for 1 year.
- Do not track in Quickbooks: Use if the vacation pay applies within the first year of employment.
Once completed, Save.
7. Complete the Pay Types Section

Click Start to edit this section.
Set the following:
Employee pay type: Hourly, salary, or commission only
Rate per hour: If hourly pay
Pay Frequency: Either per year, per month, or per week if the pay type is salary
Scroll down to Time off pay policies.
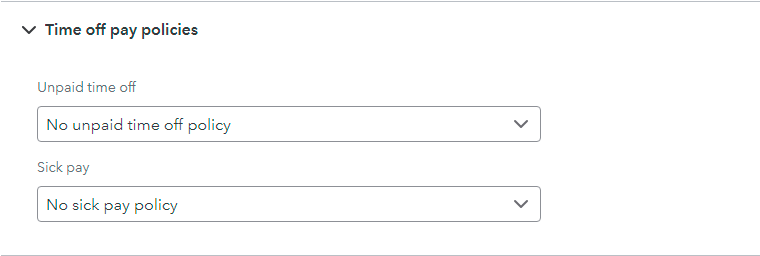
At the drop-down arrow for Sick pay, choose the option that applies:
- 40 hours/year (accrues at the start of the year).
- Add the current balance of 40 since each employee is allowed 5 paid sick days for the year.
Scroll down to the Common pay types section and tick the ones that will apply to this employee.
- Overtime pay
- Bonus
- Travel Allowance
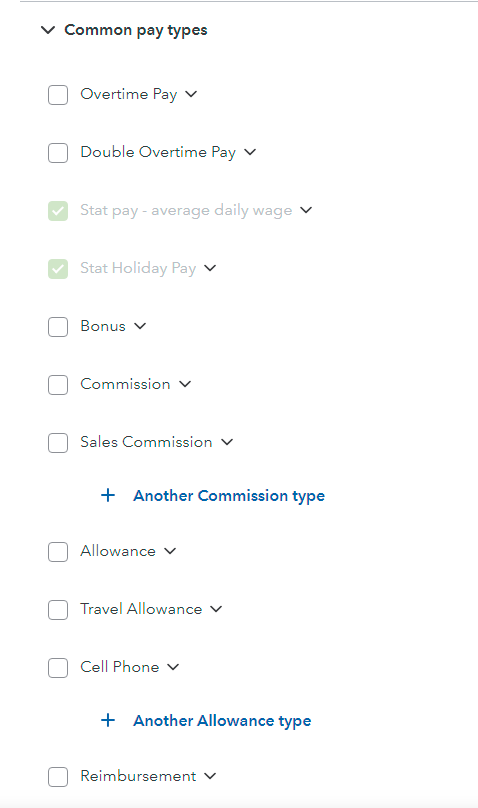
Once completed, Save.
8. Complete the Deductions & Contributions Section

Click Start to edit. Choose the option that applies to the Employee for the Dental benefits access.
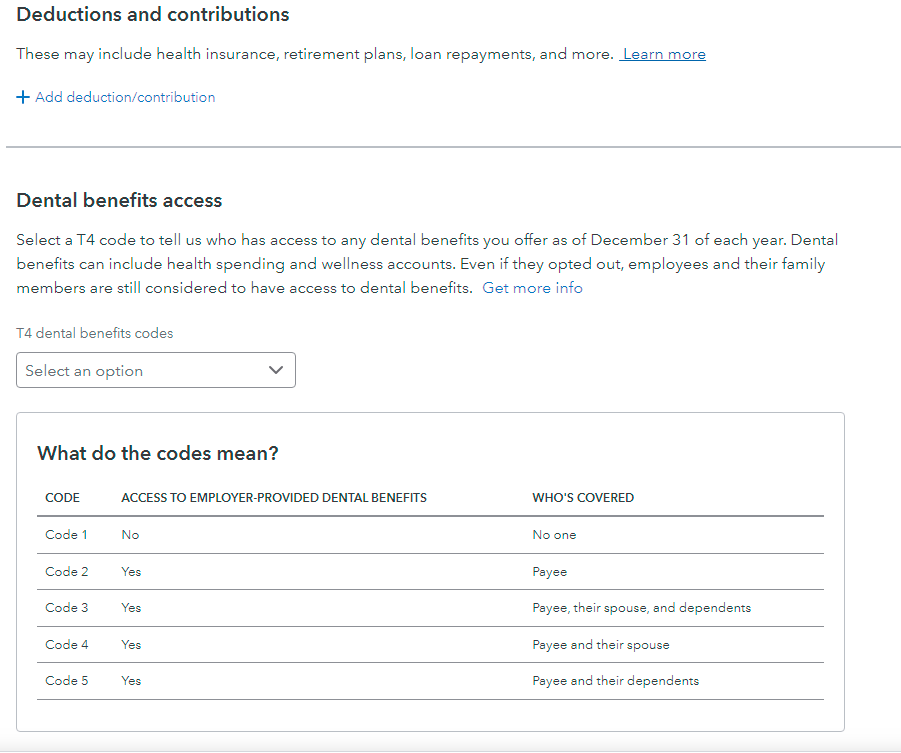
Click Done to save and exit.